


What's this Ansible?
Ansible is an open-source automation tool, or platform, used for IT tasks such as configuration management, application deployment, intraservice orchestration, and provisioning.
Ansible uses playbook to describe automation jobs, and playbook uses very simple language i.e. YAML (It’s a human-readable data serialization language & is commonly used for configuration files, but could be used in many applications where data is being stored)which is very easy for humans to understand, read and write. Hence the advantage is that even the IT infrastructure support guys can read and understand the playbook and debug if needed (YAML – It is in human-readable form).
How Ansible works?
In Ansible, there are two categories of computers: the control node and managed nodes. The control node is a computer that runs Ansible. There must be at least one control node, although a backup control node may also exist. A managed node is any device being managed by the control node.
Ansible works by connecting to nodes (clients, servers, or whatever you're configuring) on a network, and then sending a small program called an Ansible module to that node. Ansible executes these modules over SSH and removes them when finished. The only requirement for this interaction is that your Ansible control node has login access to the managed nodes. SSH keys are the most common way to provide access, but other forms of authentication are also supported.

Task-01: Ansible Master Setup
Installation of Ansible on AWS EC2 (Master Node)
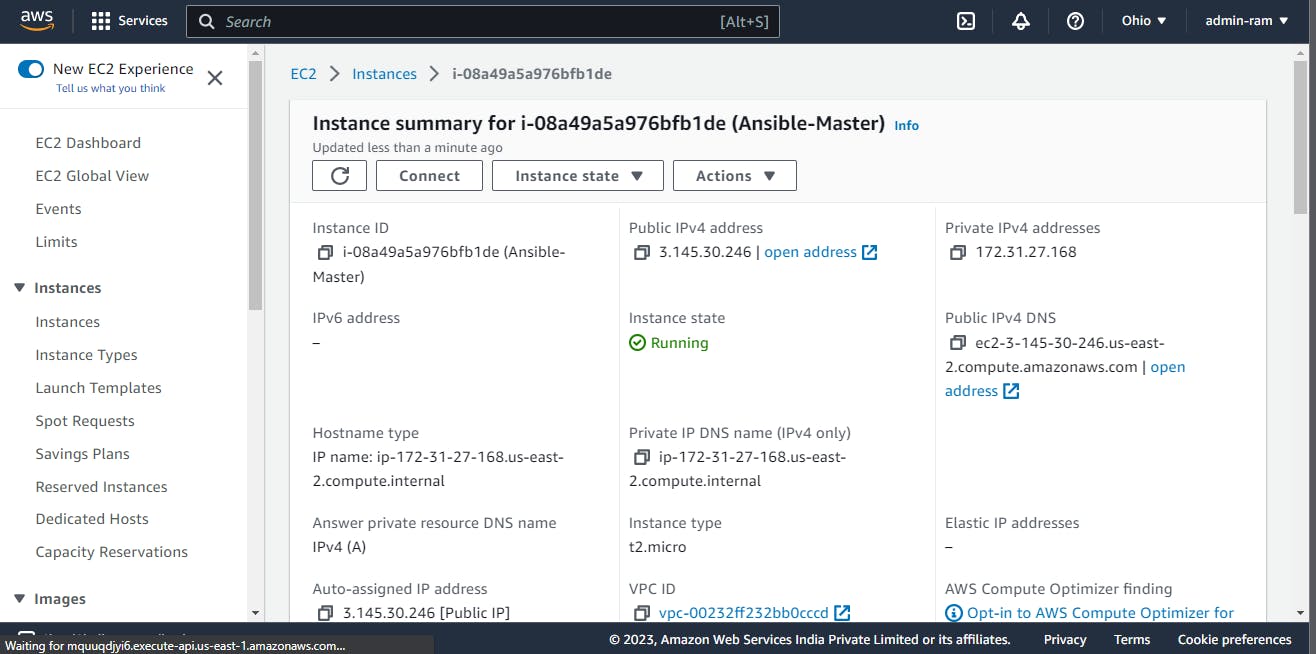
Create an instance and name it Master. This server will be used as a master Ansible server.
Login to the server and create an ansible repository on the server.
sudo apt-add-repository ppa:ansible/ansible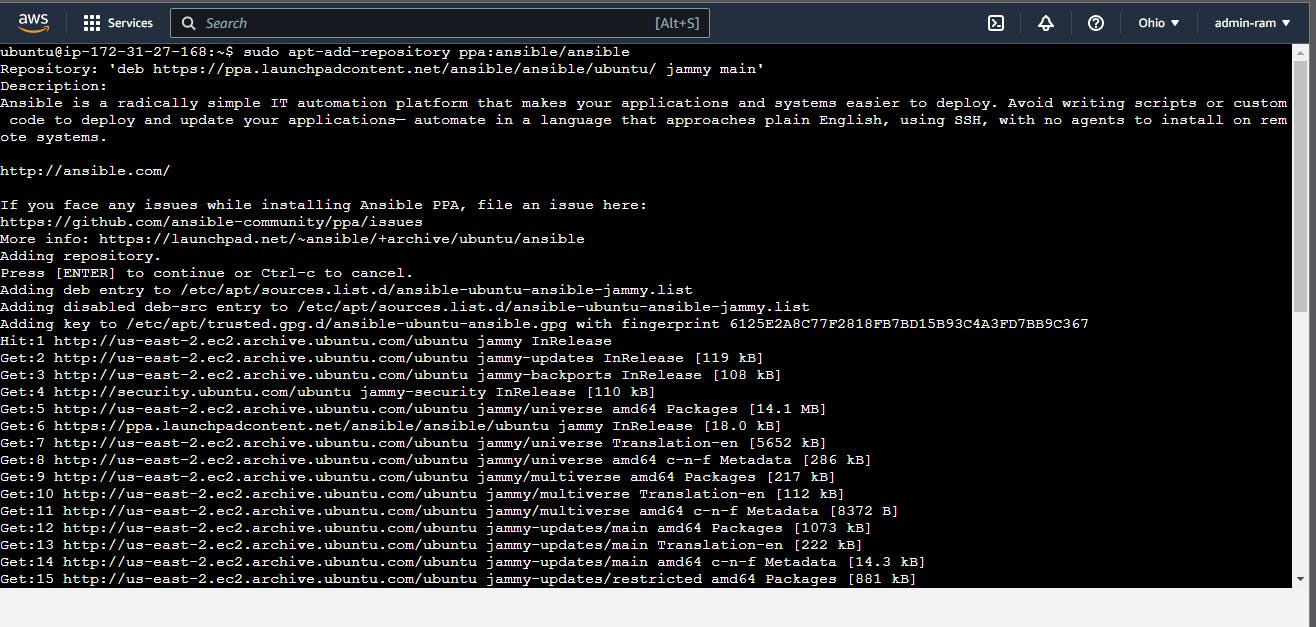
Now install ansible on the install by following the below command.
sudo apt update && sudo apt install -y ansible

Task-02: Creating Inventory
Ansible Inventory - Ansible automates tasks on managed nodes or “hosts” in your infrastructure, using a list or group of lists known as inventory. You can pass host names at the command line, but most Ansible users create inventory files. Your inventory defines the managed nodes you automate, with groups so you can run automation tasks on multiple hosts at the same time. Once your inventory is defined, you use patterns to select the hosts or groups you want Ansible to run against.
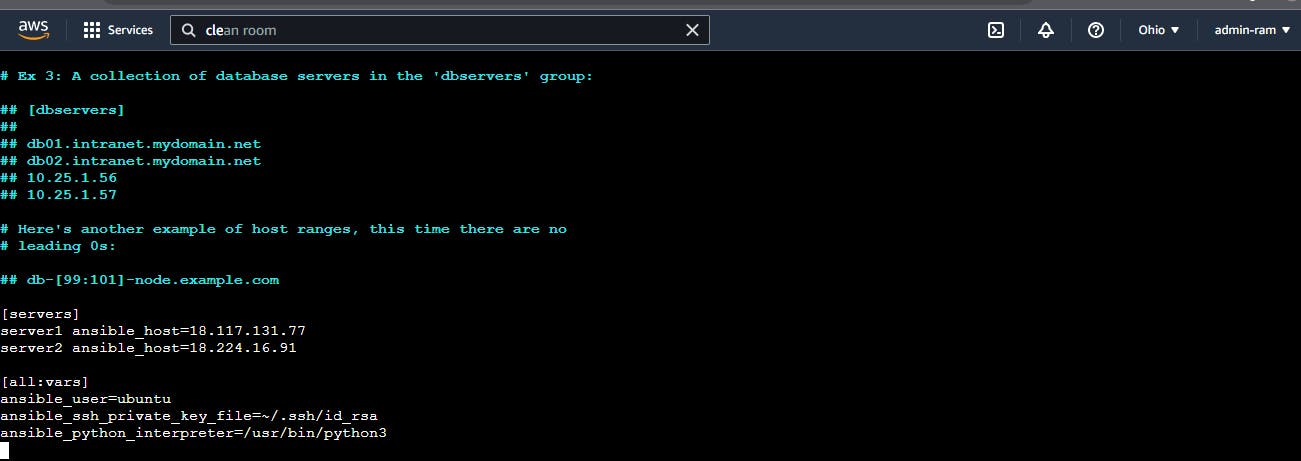
Create an inventory file in the below path and name the file as host.
sudo nano /etc/ansible/hosts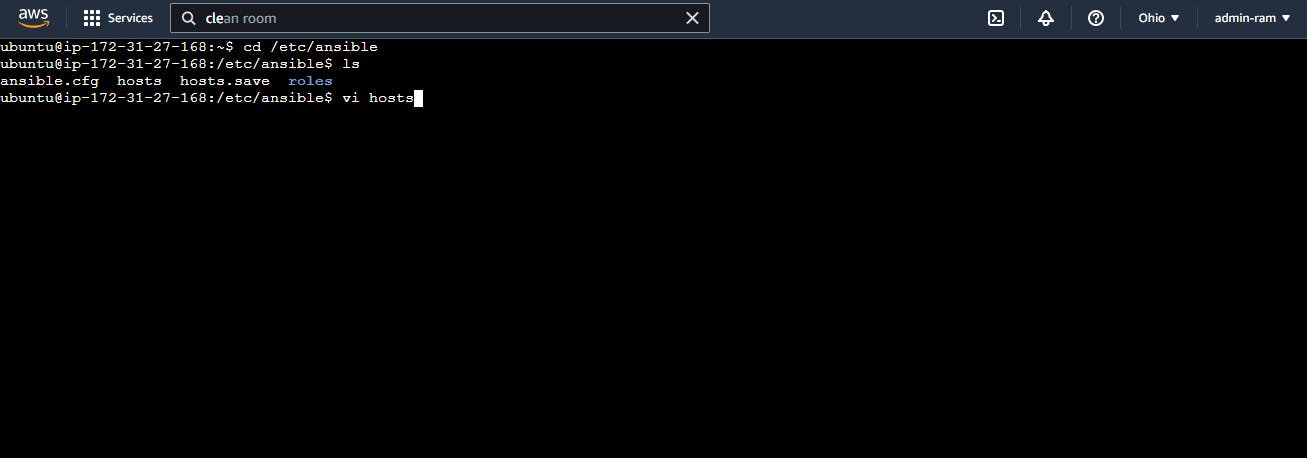
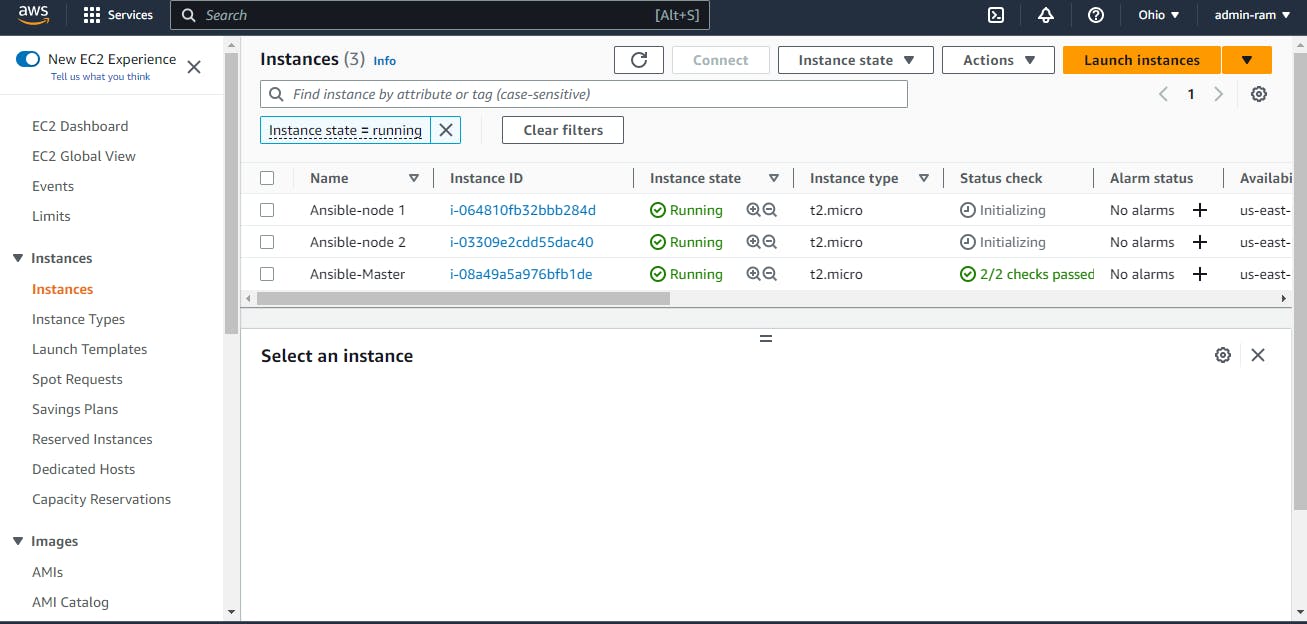
- Before that, we need to create two Ansible node servers which will be connected to the Ansible master server.
3. Assign the values in the file as shown in the below screenshot and save.
Let's verify the inventory that we have created.
ansible-inventory --list -y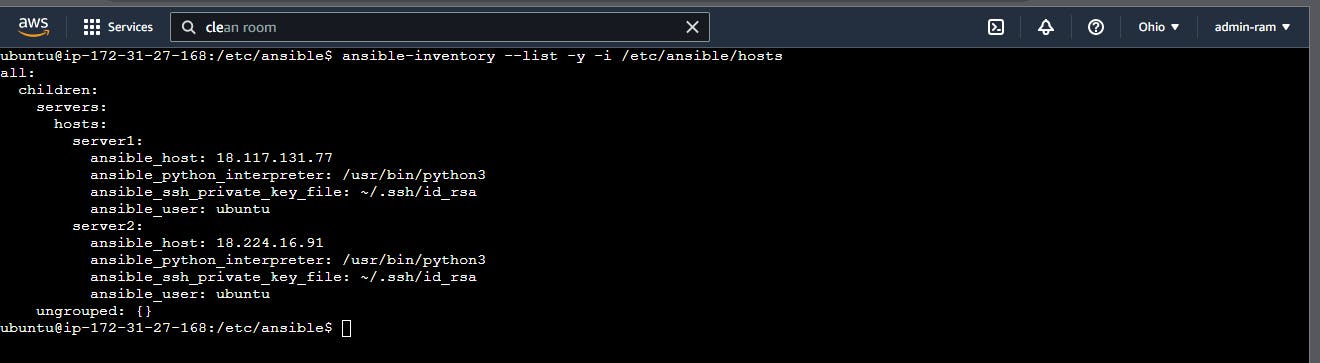
Task-03: Ansible Master-Node Configuration
Setup 2 more EC2 instances with the same Private keys as the previous instance (Node)
We have created the two servers and set up the server to master the above task.
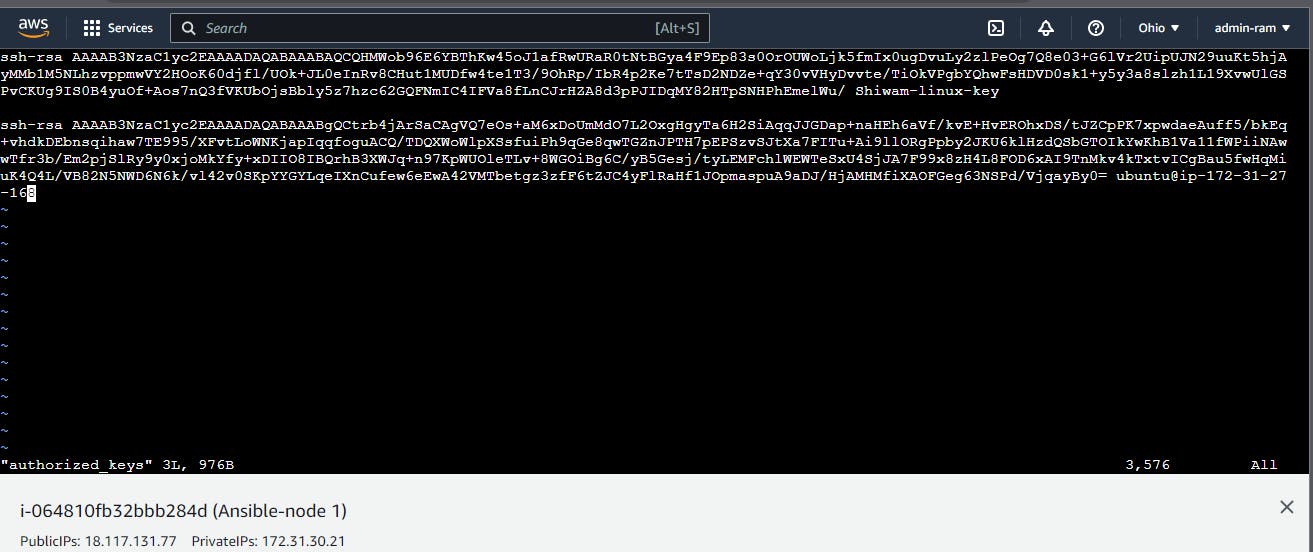
Copy the private key to the master server where Ansible is set up.
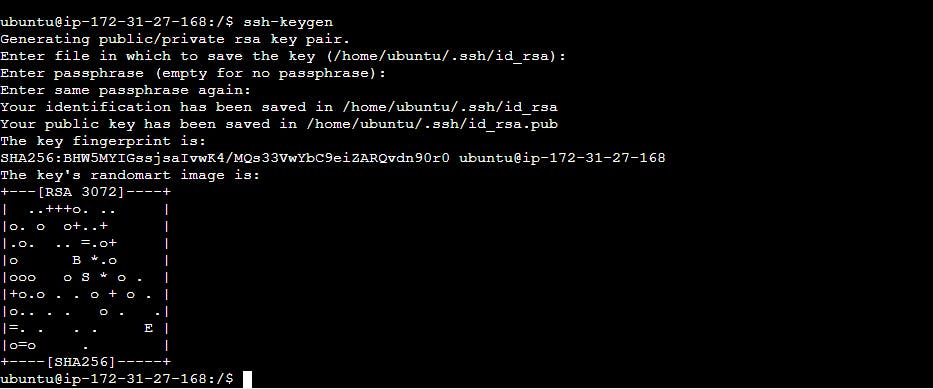
- Create a public key on the master server and copy the key using the ssh-keygen command.
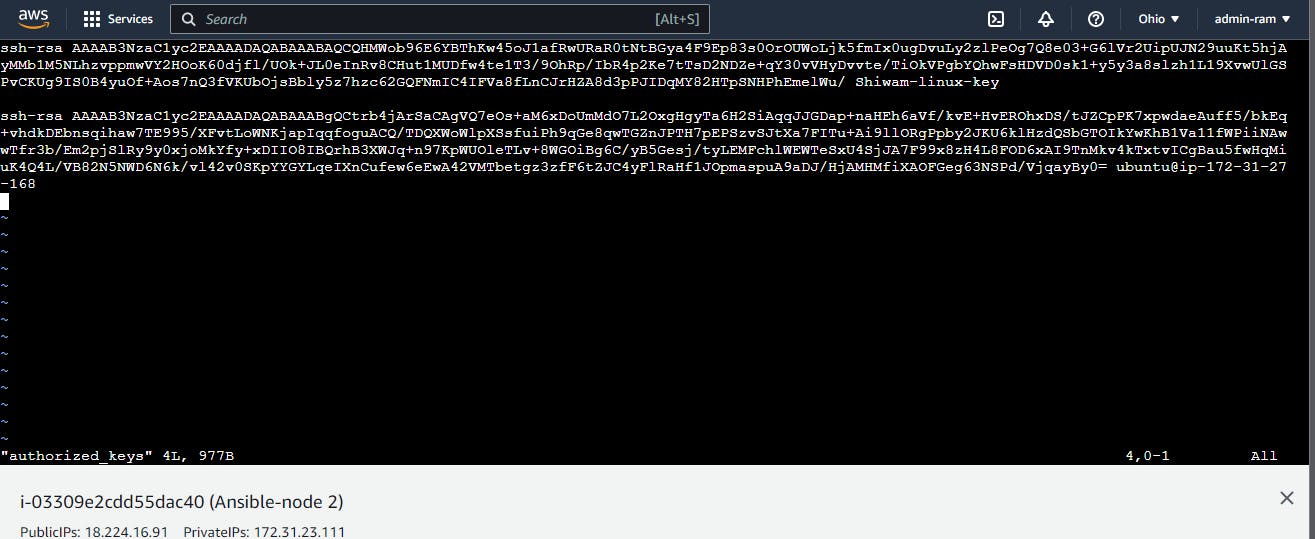
2. We can see id_rsa.pub which is the public key of the master server.

Copy the above public key of the master to both the node server.
Try a ping command using Ansible to the Nodes.
Now, use the ping command with the input of inventory file to it so that it will ping both the node servers.
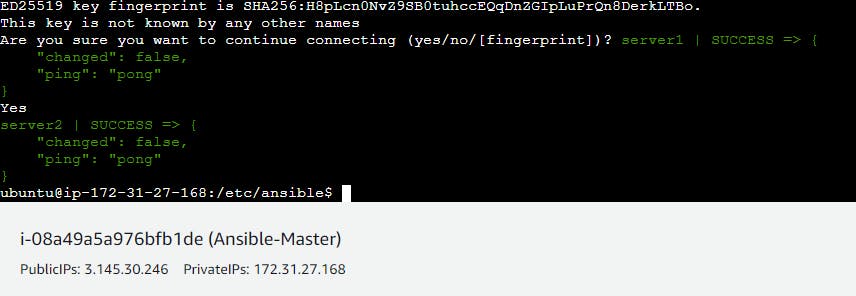
- We can see both pings are successful which indicates servers are in active states.
Thanks for reading my article.